Hi!
I purchased a Tippecanoe T37 RC Sailboat kit with the racing upgrade in September, 2013. In trying to research the best techniques for building a T37 online I came across some other people's building projects and a few chat sites. They were helpful but we can always use more ideas so I thought I'd start my own T37 build blog and see how it goes.
The instructions that come with kit are quite comprehensive, and there is even a webpage run by Tippecanoe that shows some of the assembly steps, so my focus will be on: 1.) Techniques that I found to be helpful, and 2.) Those times when I didn't follow the instructions and did things my own way.
STEP 1:
Buy a T37 kit
Go to the Tippecanoe website and see what they have. I saw their display at the Port Townsend Wooden Boat Festival in September and was captivated. They have some smaller toy sailboats. Then they also have their more serious kits starting with the T27. They also have boats larger than the T37... T50MOD, T52, and T65. Someday I'll hopefully build one of those larger ones, and probably would have gone straight to them except that I would have one of the only ones around the Seattle area and have no one to race with. I'm not that into racing but it would be nice to keep the option open. The Seattle area has the largest T37 racing fleet in the world with some Olympic sailors participating.
STEP 2:
Open the kit and read the manual. Get a sense of what the steps are.
STEP 3:
Look online for great examples. The Tippencanoe website has loads of great pictures. There are some boats clearly just slapped together so they could go sailing. But then there are the museum pieces! Some of the better boats are truly works of art. My talents aren't that good, but that's at least the direction I'd like to go.
You'll immediately notice some things about the better boats. First, they have gorgeous decks. Many don't use the standard deck, or they modify the looks of it in beautiful ways. There are many options so see what others have done. Secondly, you'll see that some of the paint jobs look like they were professionally done. I've got some experience with epoxy and fair amount of woodworking so I'm pretty sure I can make a nice deck. I'll need to learn a lot though during the painting stage.
First Idea... I raked the transom:
I really like the look of the T37 as it is except for the transom which, to my eye, it much too vertical. I prefer an old-school raked transom and asked Will and Alan if it was within the rules to further rake the transom. They said that we are allowed to (up to a point... but as I'm updating this a year later I have now forgotten the exact amount. It was either 1/2" or 3/4". I do remember that mine is less than what they allowed and yet still looks good to my eye.)
It was a pretty simple matter of marking the sides of the hull and making a replacement piece from some scrap ply. In my case I'm fortunate enough to have a stationary sander and was able to simply sand it to the rake I wanted.
See the final pictures for a better idea of what the raked transom looks like.
If you want to rake your transom be sure to get an official ruling from Will or Alan before doing so. Raking too much would disqualify your boat from racing.
Custom Deck Idea:
I decided to start with the deck. Most people use the standard deck. Tippecanoe sells a mahogany strip decking kit that you can glue on top of the standard deck for a more customized look. The boats I've seen using that didn't look good enough in my eye so I wondered if I could just make my own replacement deck. Will Lesh, the designer and owner of Tippecanoe told me that they do allow you to make your own deck so long as it: 1.) weighs at least 7 oz, and 2.) keeps the same shape of the original deck and the original hull shape.
I bought the mahogany strips, but wasn't sure how I'd use them. Online I saw some decks that looked beautiful and replicated the look of caulking between planks of wood. They had obviously laminated wood strips of different species together and then milled down the piece to become a deck. That's what I did.
The trick though was to find wood thin enough, and of enough contrast, to give that look of a real boat deck. Then I remembered that I bought that mahogany strip set. That was my starting point. Those strips were so thin that they would make great caulking.
Next I looked for a lighter colored wood. Alaskan Yellow Cedar was my first thought, but it's so expensive and my lumber yard only had very large sticks of it. Then I found some smaller sticks of tight-knot fir. Beautiful wood. Also a light wood (though a bit soft).
I cut the fir down into strips on my tablesaw to replicate the planks. Kept them 1/2" thick and 5/16" wide.
 I also had some spare mahogany left from a previous project, so I made a wider king plank for the center of the deck.
Now the trick was how to laminate the fir strips with the super thin strips of mahogany. To simulate caulking I put the thin mahogany strips on their sides to only show their edges between the 5/16's fir strips. The thin planking strips were only 1/4" wide, but the fir strips were 1/2" thick, so to keep the panel flat while gluing it I had to put a full strip along one edge of the fir and then place small cutoff strips of mahogany in three places so they'd line up where the clamps would go.

You can see in the picture above that I marked a triangle on the strips so that I could keep them organized and glued up properly.

In the pictures above you can see how I put small cutoffs of the mahogany strips in three places next to the full strips. I placed them so they would all line up where the clamps would go so that when pressure was applied the panel wouldn't just fall apart. It made for a fairly flat deck although with a very slight curve in it (which I like actually!).

After the glued panel was dry I used my surface planer to thin the panel down to 1/8" thick. That's as thin as I dared go. Sanding would thin it more but it's not as strong as the standard plywood panel and I'll need to put a thin layer of 1.4 oz. fiberglass cloth on top later on.
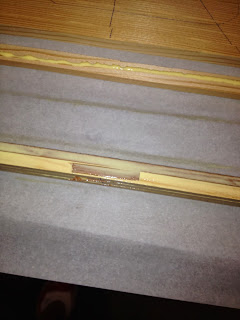
Final deck result below.

The image below is the new panel next to the standard plywood deck that comes with the kit. I'll use the deck to trim my new one.

I then added some mahogany trim around the inside of the RC deck opening. The opening had to be enlarged, then I fitted a glued up 'frame' into that opening so that it perfectly matched the original deck. Used a flush trim router bit to match the two. The original frame that I fit was oversized so that I could use the router later.

Here is the rough trimmed deck. It's still a bit oversized until I decide if I'll mount the deck on top of the hull or inside the hull as the instructions suggest. Either way is OK with Will as long as the hull shape remains the same.
UPDATE: Because I did not use the kit deck, the new deck only added a small amount of weight to the overall boat. Yes, it was on top of the deck and probably raised the center of gravity, but not much to speak of. My entire boat weighs less than 5 lbs and sails well. Try making your own deck!

That's my first update. Hopefully more later. Happy sailing!
Steve
I purchased a Tippecanoe T37 RC Sailboat kit with the racing upgrade in September, 2013. In trying to research the best techniques for building a T37 online I came across some other people's building projects and a few chat sites. They were helpful but we can always use more ideas so I thought I'd start my own T37 build blog and see how it goes.
The instructions that come with kit are quite comprehensive, and there is even a webpage run by Tippecanoe that shows some of the assembly steps, so my focus will be on: 1.) Techniques that I found to be helpful, and 2.) Those times when I didn't follow the instructions and did things my own way.
STEP 1:
Buy a T37 kit
Go to the Tippecanoe website and see what they have. I saw their display at the Port Townsend Wooden Boat Festival in September and was captivated. They have some smaller toy sailboats. Then they also have their more serious kits starting with the T27. They also have boats larger than the T37... T50MOD, T52, and T65. Someday I'll hopefully build one of those larger ones, and probably would have gone straight to them except that I would have one of the only ones around the Seattle area and have no one to race with. I'm not that into racing but it would be nice to keep the option open. The Seattle area has the largest T37 racing fleet in the world with some Olympic sailors participating.
STEP 2:
Open the kit and read the manual. Get a sense of what the steps are.
STEP 3:
Look online for great examples. The Tippencanoe website has loads of great pictures. There are some boats clearly just slapped together so they could go sailing. But then there are the museum pieces! Some of the better boats are truly works of art. My talents aren't that good, but that's at least the direction I'd like to go.
You'll immediately notice some things about the better boats. First, they have gorgeous decks. Many don't use the standard deck, or they modify the looks of it in beautiful ways. There are many options so see what others have done. Secondly, you'll see that some of the paint jobs look like they were professionally done. I've got some experience with epoxy and fair amount of woodworking so I'm pretty sure I can make a nice deck. I'll need to learn a lot though during the painting stage.
First Idea... I raked the transom:
I really like the look of the T37 as it is except for the transom which, to my eye, it much too vertical. I prefer an old-school raked transom and asked Will and Alan if it was within the rules to further rake the transom. They said that we are allowed to (up to a point... but as I'm updating this a year later I have now forgotten the exact amount. It was either 1/2" or 3/4". I do remember that mine is less than what they allowed and yet still looks good to my eye.)
It was a pretty simple matter of marking the sides of the hull and making a replacement piece from some scrap ply. In my case I'm fortunate enough to have a stationary sander and was able to simply sand it to the rake I wanted.
See the final pictures for a better idea of what the raked transom looks like.
If you want to rake your transom be sure to get an official ruling from Will or Alan before doing so. Raking too much would disqualify your boat from racing.
Custom Deck Idea:
I decided to start with the deck. Most people use the standard deck. Tippecanoe sells a mahogany strip decking kit that you can glue on top of the standard deck for a more customized look. The boats I've seen using that didn't look good enough in my eye so I wondered if I could just make my own replacement deck. Will Lesh, the designer and owner of Tippecanoe told me that they do allow you to make your own deck so long as it: 1.) weighs at least 7 oz, and 2.) keeps the same shape of the original deck and the original hull shape.
I bought the mahogany strips, but wasn't sure how I'd use them. Online I saw some decks that looked beautiful and replicated the look of caulking between planks of wood. They had obviously laminated wood strips of different species together and then milled down the piece to become a deck. That's what I did.
The trick though was to find wood thin enough, and of enough contrast, to give that look of a real boat deck. Then I remembered that I bought that mahogany strip set. That was my starting point. Those strips were so thin that they would make great caulking.
Next I looked for a lighter colored wood. Alaskan Yellow Cedar was my first thought, but it's so expensive and my lumber yard only had very large sticks of it. Then I found some smaller sticks of tight-knot fir. Beautiful wood. Also a light wood (though a bit soft).
I cut the fir down into strips on my tablesaw to replicate the planks. Kept them 1/2" thick and 5/16" wide.

Now the trick was how to laminate the fir strips with the super thin strips of mahogany. To simulate caulking I put the thin mahogany strips on their sides to only show their edges between the 5/16's fir strips. The thin planking strips were only 1/4" wide, but the fir strips were 1/2" thick, so to keep the panel flat while gluing it I had to put a full strip along one edge of the fir and then place small cutoff strips of mahogany in three places so they'd line up where the clamps would go.

You can see in the picture above that I marked a triangle on the strips so that I could keep them organized and glued up properly.


In the pictures above you can see how I put small cutoffs of the mahogany strips in three places next to the full strips. I placed them so they would all line up where the clamps would go so that when pressure was applied the panel wouldn't just fall apart. It made for a fairly flat deck although with a very slight curve in it (which I like actually!).

After the glued panel was dry I used my surface planer to thin the panel down to 1/8" thick. That's as thin as I dared go. Sanding would thin it more but it's not as strong as the standard plywood panel and I'll need to put a thin layer of 1.4 oz. fiberglass cloth on top later on.
Final deck result below.

The image below is the new panel next to the standard plywood deck that comes with the kit. I'll use the deck to trim my new one.

I then added some mahogany trim around the inside of the RC deck opening. The opening had to be enlarged, then I fitted a glued up 'frame' into that opening so that it perfectly matched the original deck. Used a flush trim router bit to match the two. The original frame that I fit was oversized so that I could use the router later.

Here is the rough trimmed deck. It's still a bit oversized until I decide if I'll mount the deck on top of the hull or inside the hull as the instructions suggest. Either way is OK with Will as long as the hull shape remains the same.
UPDATE: Because I did not use the kit deck, the new deck only added a small amount of weight to the overall boat. Yes, it was on top of the deck and probably raised the center of gravity, but not much to speak of. My entire boat weighs less than 5 lbs and sails well. Try making your own deck!

That's my first update. Hopefully more later. Happy sailing!
Steve
Thanks for sharing your build, Steve. I just received my T37 kit and am starting to build it as well. Like you I ordered the deck veneer kit, but am looking at other ways to accomplish what I want, including the possibility of laser cutting curved deck planks.
ReplyDeleteI'm also blogging the process here: http://pjl-design.com/wordpress/category/t37/
All the best,
Pete
Hi Pete,
DeleteThanks for your comment! We met at the pond a couple weeks ago. I'm excited to watch how your build goes. I'm especially interested in your laser cutting idea.
How would you do that? Do you have access to a laser cutter? I'm intrigued.
Take care,
Steve
Yes, I have a laser cutter at work (I'm an architect, and have access to a fairly substantial model building shop at work). I've templated the deck and drawn it up in CAD. I've plotted it out a few times and made some minor adjustments to make sure I've got it all correct. I will draw up a plan for the way I want the planks to look, then either laser-cut out individual planks from an 1/8" piece of teak, or cut out the deck as one piece from a single piece of teak veneer. If I go with the veneer route, I can set the strength of the laser to burn in the lines where the plank edges are, but it should keep it as a single piece, so will be easy to glue to the kit supplied deck. I'm going to do some experimenting and see which will yield the better looking results.
DeleteEnjoying your posts, Steve. I am collecting several links to post on PNMYC.org and T-37.org as I organize the many "Pearls" of wisdom from great boatbuilders like you for the benefit of those who follow.
ReplyDelete(I was certainly expecting you would rabbet the underside of the deck for the hull joint, just to match the intensity of your woodcraft! Ha ha.)
Thanks for this terrific detail. You did a beautiful job. I plan a similar deck for a T65 build. Since that deck is crowned, The 3/8 thick strips (alternating western yellow cedar and koa) would have to be laid up on top of the existing deck lying flat, uninstalled. I make the laminated deck layup on top of the plywood
ReplyDeletedeck that comes with the kit, then using thickness planer, get the lay-up down to almost 1/8 thick-- first side to even the top surface as you did, then upside down, removing most of the plywood. I think this will work!
Planks will be curved along the rail and I will try to make a notched kingplank.--that will be the hardest part.
Any comment/advice welcome. You already helped a great deal!
Carl Miller
Hawi, Hawaii
I'm building a stand for a soon-to-be-purchased T37 sailboat. Can you tell me the following dimensions: 1) keel length (including bulb) and 2) keel width at it's widest part (next to the hull). Thank you.
ReplyDelete